Saturday 31 January 2015

Healthy Pizza Recipes

Healthy Pizza Recipes Biography

source(google.com.pk)
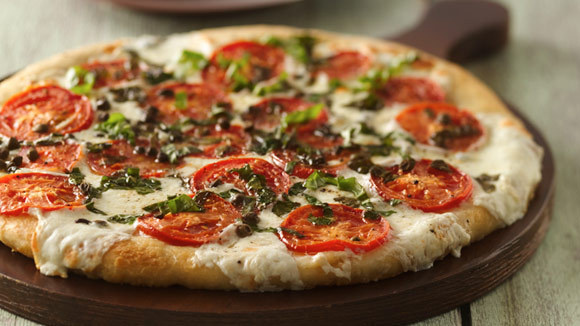
When most folks think of junk food somehow pizza gets lumped into the same category as Coca Cola and Pop Rocks. Poor pizza. I beg to differ. At my house, pizza is part of our healthy diet. Italians have been eating tomato pie for hundreds of years, and traditional cultures have been eating similar flat bread dishes since way before that.
So why the giant chasm of opinion about pizza’s health food status?
Well, for starters, most modern pizzeria pizzas (or the freezer section varieties) are made with over-processed wheat flour; commercial yeast, low fat mozzarella cheese from factory farmed cows; tomato sauce made with sugar, refined salt, nasty vegetable oils and probably BPA if it comes from a can; plus meat toppings filled with nitrates, antibiotics, and hormones. Yes, that sounds like junk to me too.
The fact is, when you make pizza with REAL wholesome ingredients, it is nutrient dense and even more delicious.
Using sprouted wheat flour makes your pizza more digestible and provides more bio-available nutrients than regular flour. To be super ‘real food’ about it, this crust would be made with a sourdough starter too. Instead, I’ve taken the short cut of using dry active yeast, but I buy an organic yeast that is processed without chemicals and is GMO-free. Cheese and meat from pasture-raised animals and seasonal veggies round out the health food profile of this classic pizza dish.
But the best part about this healthy pizza recipe?  It tastes like straight up pizza. Simple, comforting, and oh-so delicious.izza is one of those things that have no substitute. When you have cravings for pizza, nothing else will do! But it goes without saying that most pizze (Italian plural! how fancy of me) are not good for you. So I created a low fat gluten free vegan pizza that’s healthy as it is satisfying!Once the sauce is done and the crust is out of the oven, you may spread the sauce over the pizza and cover it with vegetables of your choosing. I used mushrooms, grape tomatoes, corn, broccoli, a golden beet, red pepper, yellow squash, and red onion. Place back into the oven for about 20 minutes, or until the crust is to your liking and the veggies are thoroughly cooked.

If you’d like a cheezy sauce, I made one as well! **Note: I baked it with the pizza after it had been in the oven about ten minutes, but I think it would taste better/have a nicer texture as a dipping sauce or poured over the finished pie. Baking it changed the consistency and flavor some Pizza is undoubtedly one of our favourite take out foods. However, it has also become a very difficult food to digest due to the combination of refined wheat, sugary sauces, contaminated cheeses, and nitrate filled meats. It’s time to make pizza healthy, and we start with the crust and move our way to the toppings.

Purpose

We don’t want to give up pizza…but we can’t continue to eat it the way it is typically prepared and expect our body to feel good about it.  The good news is pizza can still be as good as you remember it by making a few simple switches so that your ingredients are not as harmful to your gut. We start with an easier digestible grain in quinoa, and substitute the toppings with something a bit more nourishing, while still remaining delicious.

Equipment Required

Good quality blender
12 inch skillet
Ingredients

Crust

1 cup quinoa (cover with enough water to soak)
1/4 grapeseed oil or olive oil
1/2 cup filtered water
1/2 tsp sea salt
1/2 tsp garlic powder
1/2 tsp italian seasoning
Sauce

1 cup sun-dried tomatoes, soaked for 2 hours and drained
1 medium tomato
3 tbsp cold pressed olive oil
2 large pitted dates
1 clove garlic
1 tsp salt
1 tsp italian dressing
1/2 tsp ground black pepper
Directions


Crust

Place quinoa in bowl and pur in enough water to cover.  Let it soak for 8 hours.
Preheat oven to 450F. Take large, 12 inch skillet and brush with oil. Place in oven to preheat.
Drain quinoa and rinse thoroughly, then place in blender.
Add most of water and seasonings and blend. Add more water as needed until batter resembles that of pancakes.
Once oven is heated, pull out skillet and pour the batter onto it and quickly spread it out evenly across the bottom. Place back in oven and bake for 10 minutes or until underside is well browned and starting to crisp.
Use large spatula and carefully flip the crust.
Bake for another 10 minutes, and pull out of oven.
Sauce

Place all ingredients into high speed blender, and blend until smooth.
Assembly

Add sauce to top of pizza crust and spread evenly with spatula.
Add veggies, and organic chicken breast or grass feed beef, if desired.
Add daiya, feta, or goat cheese on top, if desired.
Put back in oven for additional 5-7 minutes, or until cheese is melted.

Healthy Pizza Recipes

Healthy Pizza Recipes

Healthy Pizza Recipes

Healthy Pizza Recipes

Healthy Pizza Recipes

Healthy Pizza Recipes

Healthy Pizza Recipes

Healthy Pizza Recipes

Healthy Pizza Recipes

Healthy Pizza Recipes

Healthy Pizza Recipes

Friday 30 January 2015

White Pizza Recipe

White Pizza Recipe Biography

source(google.com.pk)
This will most likely be a long post.  I won’t be offended if you skip all the writing.

But, The Curvy Carrot (my extracurricular baby) has just turned one.

I cannot believe that I started this blog one year ago.  I had just gotten back from the Food and Light Workshop in Boulder, Colorado with Annie.  I had been tossing the idea around in my head for a long time.  There I was, the ONLY participant at the workshop with these super talented and ingenious photographers/chefs/bloggers…and when I introduced myself, I was totally embarrassed to admit: “I don’t have a blog….yet.”  Suffice it to say, I think I have come a long way in a year, but I know I have so much more to learn.

A year ago, I was living with my parents, in the middle of a very intense period of my life:  finishing up residency, going through a divorce from a very unhealthy relationship, trying to sell a home in a super horrible market, but I simply decided to lay it all out there and start doing what I wanted to do.  No more limitations, no more disappointments, no more sacrificing what I wanted for anyone else. And what I wanted to do was channel my energy into something that would inspire me, lift me up, challenge me, and allow me to grow as a novice cook and blogger.  I was told so many times that I didn’t know how to cook, I couldn’t scramble an egg the right way, that my way was always the wrong way, that I chopped an onion wrong…just to name a few.  No more.  I wasn’t listening to or believing that anymore.  Instead, I was going to start listening to that faint voice in my head that was echoed by one of my dearest friends very loudly (Annie, of course) who told me that I could do it.  Even if no one ever read this little blog….it was mine.  All mine.  And the pictures? All mine.  And the food? All made and tasted by me…and yes, I can cook.

I’ve reached several goals in a year.  I’ve posted every other day religiously, tried new foods, challenged my lack of creativeness, made both Foodgawker and Tastespotting (originally I was so intimidated to even submit anything!), made lots of new and amazing friends through the blogging world (you are the best-I know I don’t return comments as frequently as I should, but I will try to be better, I promise!), figured out the do’s and (definitely) do not’s of the blogging world (but I am still learning, of course), and, all along the way, I am celebrating the power that lies within the ability to just stop saying why you can’t do something….and suddenly figuring out that you most certainly can.

So, a year later, I am in a (very) tiny and (very) hot little one-bedroom basically studio apartment with two cats and one very tired doggy (who loves her new friends at “camp” everyday) with an oven that only fits one baking sheet at a time and an excruciatingly long pre-heat time.  I have really no counter space, and although I have overhead skylights, the harsh direct sunlight is very difficult to work with.  I’ll be experimenting with diffusers, white boards, and props.  I’ll be trying to branch out of my macro lens dependence.  I’m dedicated to making better (and hopefully healthier!) food and taking better (natural light) photos (but I am still going to throw indulgences in there every so often, you know).  Bear with me.  I’m planning a very fantastic upgrade to the website within the next few months to make it easier to navigate and more “professional” looking.  And as far as I am concerned, I am just getting started.

To celebrate my “blog anniversary”, so to speak, I am putting links to ten of my most personal favorite posts over the past year.  My, what a fun ride it has been!I have always been a fan of white pizzas, and with all these great options for cheeses out here,  I knew I couldn’t go wrong with a four cheese pizza..with my favorite herb: basil.  The cheese choices could be easily substituted with your own favorites, but I personally loved the combination of both the softer ricotta and goat cheeses with the mozzarella and Parmesans.  I put a little red pepper flakes on mine and sprinkled a teensy bit of flaked sea salt on top.  SO GOOD!Four Cheese White Pizza

Servings: 1 pizza, approximately 6-8 slices

Ingredients

For the dough:***This recipe makes enough for two pizzas.

1/2 cup warm water

2 and 1/4 teaspoon (or one packet) of instant yeast

4 cups (22 ounces) bread flour, plus more for rolling out your dough

1 and 1/2 teaspoons salt

1 and 1/4 cup water, at room temperature

2 tablespoons olive oil.
This will most likely be a long post.  I won’t be offended if you skip all the writing.

But, The Curvy Carrot (my extracurricular baby) has just turned one.

I cannot believe that I started this blog one year ago.  I had just gotten back from the Food and Light Workshop in Boulder, Colorado with Annie.  I had been tossing the idea around in my head for a long time.  There I was, the ONLY participant at the workshop with these super talented and ingenious photographers/chefs/bloggers…and when I introduced myself, I was totally embarrassed to admit: “I don’t have a blog….yet.”  Suffice it to say, I think I have come a long way in a year, but I know I have so much more to learn.

A year ago, I was living with my parents, in the middle of a very intense period of my life:  finishing up residency, going through a divorce from a very unhealthy relationship, trying to sell a home in a super horrible market, but I simply decided to lay it all out there and start doing what I wanted to do.  No more limitations, no more disappointments, no more sacrificing what I wanted for anyone else. And what I wanted to do was channel my energy into something that would inspire me, lift me up, challenge me, and allow me to grow as a novice cook and blogger.  I was told so many times that I didn’t know how to cook, I couldn’t scramble an egg the right way, that my way was always the wrong way, that I chopped an onion wrong…just to name a few.  No more.  I wasn’t listening to or believing that anymore.  Instead, I was going to start listening to that faint voice in my head that was echoed by one of my dearest friends very loudly (Annie, of course) who told me that I could do it.  Even if no one ever read this little blog….it was mine.  All mine.  And the pictures? All mine.  And the food? All made and tasted by me…and yes, I can cook.

I’ve reached several goals in a year.  I’ve posted every other day religiously, tried new foods, challenged my lack of creativeness, made both Foodgawker and Tastespotting (originally I was so intimidated to even submit anything!), made lots of new and amazing friends through the blogging world (you are the best-I know I don’t return comments as frequently as I should, but I will try to be better, I promise!), figured out the do’s and (definitely) do not’s of the blogging world (but I am still learning, of course), and, all along the way, I am celebrating the power that lies within the ability to just stop saying why you can’t do something….and suddenly figuring out that you most certainly can.

So, a year later, I am in a (very) tiny and (very) hot little one-bedroom basically studio apartment with two cats and one very tired doggy (who loves her new friends at “camp” everyday) with an oven that only fits one baking sheet at a time and an excruciatingly long pre-heat time.  I have really no counter space, and although I have overhead skylights, the harsh direct sunlight is very difficult to work with.  I’ll be experimenting with diffusers, white boards, and props.  I’ll be trying to branch out of my macro lens dependence.  I’m dedicated to making better (and hopefully healthier!) food and taking better (natural light) photos (but I am still going to throw indulgences in there every so often, you know).  Bear with me.  I’m planning a very fantastic upgrade to the website within the next few months to make it easier to navigate and more “professional” looking.  And as far as I am concerned, I am just getting started.

To celebrate my “blog anniversary”, so to speak, I am putting links to ten of my most personal favorite posts over the past year.  My, what a fun ride it has been!I have always been a fan of white pizzas, and with all these great options for cheeses out here,  I knew I couldn’t go wrong with a four cheese pizza..with my favorite herb: basil.  The cheese choices could be easily substituted with your own favorites, but I personally loved the combination of both the softer ricotta and goat cheeses with the mozzarella and Parmesans.  I put a little red pepper flakes on mine and sprinkled a teensy bit of flaked sea salt on top.  SO GOOD!Four Cheese White Pizza

Servings: 1 pizza, approximately 6-8 slices

Ingredients

For the dough:***This recipe makes enough for two pizzas.

1/2 cup warm water

2 and 1/4 teaspoon (or one packet) of instant yeast

4 cups (22 ounces) bread flour, plus more for rolling out your dough

1 and 1/2 teaspoons salt

1 and 1/4 cup water, at room temperature.

2 tablespoons olive oil.

White Pizza Recipe

White Pizza Recipe

White Pizza Recipe

White Pizza Recipe

White Pizza Recipe

White Pizza Recipe

White Pizza Recipe

White Pizza Recipe

White Pizza Recipe

White Pizza Recipe

White Pizza Recipe

Recipe For Homemade Pizza Dough

Recipe For Homemade Pizza Dough Biography

source(google.com.pk)

After recently posting a collection of pizza-making tips, I bought some Pizza Tonight dough and made some of my own dough as well. Then, I made six pizzas for 20 people at my wife’s birthday party and the outcome revealed a real disparity. My competently made pizza dough couldn’t hold a candle to Pizza Tonight’s. People raved about every pizza I made with it. I put white sauce on that light and airy dough and nestled brussels sprouts and caramelized onions into it. Draped some thinly sliced ham (donated by an attendee) and added smoked mozzarella. Scattered potato slices with garlic and rosemary. Each of those pizzas, in turn, totally stole the show. I’m telling you a monkey could make amazing pizza with Pizza Tonight’s dough as the foundation. Not a bite of crust was left behind.
We won’t get into how the pizzas with my dough fared. The point is, I was just about to call it quits.  Stop the exploration of every kind of pizza. And just tithe part of my paycheck to Victoria Deroche’s Pizza Tonight business. And then Doug emailed me about New Jersey tavern-style pizza. What’s this? Bar pizza? A style of pizza I’ve never heard of? His name is Doug Mulvihill, and we first corresponded in response to my La Michoacana ice cream post. Months later, he saw my pizza post and let me know that he’s got some pizza secrets of his own from several years working on his technique. Now, let me get outta the way, so Doug can tell you how he, um… rolls.
—————-
it’s all Doug from here down
—————-
I love pizza, and I think I make fairly decent pies, so hopefully I can provide some information that might help someone. Before I explain everything, I need to provide some context on my pizza history and what prompted me to make my own pies.We all have our favorite pizza. Based on what I have seen, most people become attached to the pizza of their youth. The pizza we eat as children shapes our appreciation. Generally people idealize their first pizza, and it becomes their favorite for life. None of us is wrong, we just like what we like.
I think the greatest pizza in the world is made in Orange, New Jersey, at Star Tavern. Star is famous for making a style some call “bar pizza”, which has a very thin crust and is quite popular in New Jersey (where I lived until 1990). I know that I am among many thousands of people who consider Star to be the very best pizza ever made. Although I have not had it regularly in the past 20 years, I have been eating it my whole life.
But this story begins earlier than that. My father has also been eating Star pizza for over 40 years. He lived most of his life in New Jersey, so his favorite pizza was always available to him. When he retired, he and my mother decided to move to North Carolina for a life of golf and leisure. Unfortunately, this meant that he would no longer be able to have Star pies regularly. This seemed unacceptable to my father, so he developed a novel solution. At his last visit to Star, he explained to the owner that he was moving to North Carolina and would probably not have access to good pizza. He asked the owner a simple question. “How do you do it?” Fortunately, the owner did not feel compelled to guard the secrets that made his establishment one of the most successful and famous pizzerias in the northeast. He didn’t just give my father some advice, he told him EVERYTHING. He brought my father into the kitchen and showed him all of the techniques for making ultra thin crust pizza. He gave him a few industrial sized cans of tomatoes, and wished him luck.
That was almost 15 years ago, and my father has been making New Jersey bar pizza (following the Star recipe) ever since. A few years ago, he gave me all of the necessary tools, and explained the process to me. He also taught my brother. Now we all make our version of Star pizza, using the same ingredients and same process.
That’s the back story. Now I will explain the particulars. Please refer to the footnotes for explanation, commentary, and guidance. I tried to keep the “recipe” section neutral and direct.A pizza's crust can be made using almost any dough or bread recipe. White flour is commonly used for a soft crust that won't crumble, which is usually considered desirable. Whole wheat flour can be used to make a firmer crust. Cake flour can be useful if a crumbly crust is desired. Other common ingredients in crusts include Olive oil (usually extra virgin), active dry yeast, sugar, and salt. Less often crusts will include ingredients like malt-syrup, vital wheat gluten, and various dough activators to help the yeast ferment and the crust to brown while baking. What type of crust to use is matter of taste.

There are several types of pizza crust that are constructed differently and have (sometimes) wildly different textures, though the taste remains fairly consistent. The most common styles are Neapolitan, thin, New York-style, deep dish, Sicilian, and pan pizza crust.

There are many different techniques for preparing dough, most largely dependent on the type of crust you've decided to make. Because pizza crusts almost always contain yeast they must be allowed to rise at least once, though some recipes recommend improving the flavor and texture of the dough by allowing the crust to rise 2 separate times. Higher quality recipes also often recommend that you deflate the dough after the first rise and refrigerate it overnight to help improve its flavor and texture. Depending on the recipe dough docking or pre-baking might be necessary as well.

thin-crust pizza without precooking the crust
deep dish pizzaPizzas are typically baked directly on special surfaces for short periods at temperatures in excess of 500 degrees F (260 degrees C).

Coal and brick ovens are preferred for baking pizza because of their even heat and superior heat-retention. Some pizzerias prefer to use a wire-mesh pan though, as working with pizza peels can be difficult for some.

Home bakers can attempt to duplicate the effects of a brick oven by using a baking stone (also called a pizza stone), a slab of porous stone that evenly heats the pizza and leeches moisture away from the dough, helping it develop a better crust. Baking/pizza stones become "seasoned" after frequent use, a characteristic that is said to improve the flavor of crusts baked on them.

Recipe For Homemade Pizza Dough

Recipe For Homemade Pizza Dough

Recipe For Homemade Pizza Dough

Recipe For Homemade Pizza Dough

Recipe For Homemade Pizza Dough

Recipe For Homemade Pizza Dough

Recipe For Homemade Pizza Dough

Recipe For Homemade Pizza Dough

Recipe For Homemade Pizza Dough

Recipe For Homemade Pizza Dough

Recipe For Homemade Pizza Dough

Monday 26 January 2015

Margherita Pizza Recipe

Margherita Pizza Recipe Biography

source(google.com.pk)
existence of a real pizzeria- since then pizzaiolos had only open -air stalls- and that  is the one born in Naples called  Porta D’Alba because it was found by the arch that introduced from Dante square into Costantinopoli street. The pizzeria had a good oven covered with firebricks and the fire was stocked by wood. Alexander Dumas, the French writer, mentioned in his works the various types of pizza made in Naples and stated that there was  a pizza  called "a otto" that  was cooked a week before eating it. But he surely was wrong since it meant that people could pay it after  eight days when they got paid.

The crowning of the pizza, certainly, happened during the visit of Queen Margherita and her prince  consort Umbert I at Capodimonte royal palace in Naples during summer 1889. The queen got curious about pizza she had probably heard by some writers or artists admitted at court. Since she couldn’t go to a “pizzeria” she had the most famous pizzaiolo of that time go to her. 

The chronicles of the times, tell that the Neapolitan pizzaiolo, Raffaele Esposito and his wife Rosa, who was the real pizza expert,  owners of the famous pizzeria “Pietro il pizzaiolo”, that later would become pizzeria Brandi, were asked to prepare in the kitchen of the palace their special pizzas. They prepared three pizzas that were introduced to the sovereigns: one made with scraps on pig fat, cheese and basil; the second one garlic, oil and tomato and the third one with mozzarella , tomato and basil, representing the colours of the Italian flag, which thrilled the queen Margherita and not only for its patriotic reasons. 

Don Raffaele being a good public-relator, seized the opportunity and called it pizza “Margherita”. He had the permission to name it after Queen Margherita. The following day he put it on the list at his pizzeria and got many and many requests. This episode had such a vast echo that the pizza Margherita and all of its variations  became so popular in Italy  that soon met the favour of people all over the world. As for the oven, ours comes from the Greek tradition  inherited by Egyptians who were the first to build it and that had a cylindrical form. Greeks modified it introducing a dome with a room. Romans learnt from Greeks how to build ovens improving dome ovens. Built with full bricks that would slowly build up heat and slowly release heat, it allowed to cook after bread, meat, fish, vegetables, cakes.

From the Roman age till the beginning of 1900s there haven’t been relevant modifications in oven building. Today there are different types on the market for domestic use (gas, electricity, air, microwave) and commercial use.


There isn’t a big difference from the oven that are made in Italy from the ones made in  Portugal or Bulgary since there is not one type : some of them are in the external part rectangular shaped others dome shaped,  but the one made in Hungary called kemence is quite interesting.

As far as pizza oven regards , it can’t be the usual common wood-firing oven but studied to cook pizza, as it is said in Naples , in a “blaze” at once!

The ideal oven should have the floor made with a first layer of tufa, a second layer with river sand , a third layer  with sea salt and the last layer with a stone called “ground of Sorrento” which has the characteristics of storing heat. In such an oven well built pizza cooks at 400° degrees or more, at  once.


The dome oven has had for centuries also a relevant social function: in villages where bread was made once a week men and women would “meet” while bread was cooking.


Today there is a new tendency that is  groups of families or friends gathering in villages or mountains on week-ends or in occasion of holidays or feasts to cook pizzas and meat and/or prepare dishes with simple local food of the traditional gastronomy  in public ovens made by  Municipalities or Comunità Montana .It is also a way to rediscover the old good way of being together and have fun in a natural environment.

Pizzaiolo
As far as the pizzaiolo concerns everything lies on his hands that he should use skilfully both to balance the ingredients and to work the dough. In fact, he should know how much salt, yeast and water to use and , according to his experience,  work the dough in a way that it should be soft and elastic. The water used is also related to weather conditions . A good pizzaiolo should know all the factors that contribute to make the success of pizza that he will acquire through years of training by experienced pizzaiolos and not following a few months course where you get a certificate at the end as most of the old experienced, skilful  pizzaiolos from Naples say.


In fact according to tradition, Pizza must be spread out only by hands, without using the rollig pin or any other mechanical tool. With a quick and wise swinging of the dough, when entrusted to wise hands, "the pettola", so it's the ready dough called, assumes its classical, perfectly round conformation, thin and of the same thickness in every single position. Pizza, made in pizza-places, has transformed into a rite: watching the best pizza-makers at work is the same as being able to admire the perfection of man' hands which, through manipulation often reaches an unbelievable spectacularity.

Margherita Pizza Recipe

Margherita Pizza Recipe

Margherita Pizza Recipe

Margherita Pizza Recipe

Margherita Pizza Recipe

Margherita Pizza Recipe

Margherita Pizza Recipe

Margherita Pizza Recipe

Margherita Pizza Recipe

Margherita Pizza Recipe

Margherita Pizza Recipe

Breakfast Pizza Recipe

Breakfast Pizza Recipe Biography

source(google.com.pk)
My son’s favorite game in the whole world is Let’s Play With The Other Baby! You Know, The One We Keep In The Mirror. We bring him over to this giant mirror in the hallway and he goes berserk, he paws at the “other” baby, kicks his legs, squeals and laughs. It cracks us up too. Babies: they’re so cute when they’re kinda confused!


It took us a few weeks to realize how sad this game actually is. My little monkey is so outgoing and eager to make friends that he’ll play with an imaginary baby that lives in the mirror to get his fix. Perhaps, we realized, hanging our heads in the shame of being the worst parents, ever, it is time for him to meet some other babies his age that he can paw and squeal at in person and they can hopefully paw and squeal back. But, of course, this isn’t a story about Jacob’s first playdate, it’s about what I made for breakfast.


Or more accurately, what I didn’t make: baked eggs and busy stratas and quiche and baked French toast and winter fruit salads and anything involving jam on bread or plates and forks. Because remember the part about the two infants? You’d be amazed at how ineffective four whole sets of adult hands are at keeping two teeny tiny infants out of harm’s way. Thus when I spun the wheel of the Things I Want To Cook list and breakfast pizza came up, I knew it would be perfect for eating with one hand while fishing out a piece of Oh God, What Is That In Your Mouth? with the other.


I was a little dubious about the intersection of mozzarella and eggs — I had a very awful omelet with that combo, plus basil, a few years ago — and I was also convinced that the eggs would roll right off the crust but ended up finding this pizza absolutely, utterly perfect in every way. The recipe is from The Big Sur Bakery in a treesy nature-loving part of the country I can barely wrap my head around right now, having spent almost the entirety of this last year in this concrete jungle and its suburban counterparts. I digress. The pizza is cheesy without being excessively so and somehow, that baked bacon/egg/melted pile doesn’t even feel heavy with all of those fresh herbs and mild onions on top. Plus, the pizza has this kind of grab-and-go, low-key vibe that is perfect for weather that demands you don’t idle long inside. Hooray for that!


One year ago: Migas with Tomato Chipotle Coulis
Two years ago: Roasted Acorn Squash and Gorgonzola Pizza and Hazelnut Brown Butter Cake
Three years ago: Strawberry Rhubarb Pecan Loaf and Italian Bread

Breakfast Pizza
Adapted, barely, from The Big Sur Bakery Cookbook via an earlier version of it

Makes 2 (12-inch) pizzas

When I asked what I would change about this when I make it again, I drew a blank. I actually like it that much the way it is. Nevertheless, the bacon could of course be omitted if you’re bacon-averse, countless toppings could be added from spinach to mushrooms or sausage, you could swap some or all of the mozzarella for goat cheese and you could swap out some of the flour in the crust for whole wheat flour. Although the recipe as is makes two large pizzas, I think it would be fun to make six smaller ones with one egg each in the center — plus, friends could choose their own toppings. So “drew a blank” = okay, I have a few ideas. But I’m pretty sure I’ll be making this exactly as written next time.

Updated note 10/17/13: I love this dough recipe, but these days I almost exclusively use this Lazy Pizza Dough (no kneading/proofing/chilling + you can choose the schedule that fits your day).

1/2 teaspoon dry active yeast
2 cups plus 2 tablespoons bread flour, plus more for dusting
Kosher salt
6 strips bacon
1/2 cup grated Parmesan
2 cups grated mozzarella
6 large eggs
Freshly ground black pepper
2 tablespoons minced flat-leaf parsley
2 tablespoons minced chives
2 scallions, thinly sliced
1 shallot, minced

The night before, prepare the dough: Place 3/4 cup lukewarm water in the bowl of an electric mixer fitted with a dough hook. Sprinkle in the yeast, stir and let sit for 5 minutes. Add the flour and 1 teaspoon of salt and mix on low for 1 minute. Increase the speed to medium and mix for 2 minutes, then increase the speed to high and mix until a smooth dough forms, about 2 minutes more. Turn the dough onto a lightly floured surface, divide into two equal pieces and form each half into a tight ball. Place on a large floured sheet pan, place the pan in a plastic garbage bag, tie the bag loosely and refrigerate overnight.

One to two hours* before baking, place the dough in a warm spot. Adjust the oven rack to the lowest position and set a pizza stone on it. Preheat the oven to 500 degrees 30 minutes before you are ready to bake the pizza.

Prepare the dough and toppings: Fry the bacon in a large sauté pan over medium-high heat until crisp. Cool on a paper-towel-lined plate; roughly chop.

Dip your hands and a ball of dough into the flour. On a lightly floured countertop, pat the dough into a disc with your fingertips, then drape the dough over your fists and carefully stretch it from beneath to form a 12-inch circle.

Generously dust the surface of a pizza peel or large inverted sheet pan with flour and place the stretched dough on it. Sprinkle the dough with half of the Parmesan, mozzarella and bacon. Crack 3 eggs over the top and season with salt and pepper.

Bake the pizza: Shake the pizza peel slightly to make sure the dough is not sticking. Carefully lift any sections that are sticking and sprinkle a bit more flour underneath, then slide the pizza directly onto the baking stone in one quick forward-and-back motion. Bake for 8 to 10 minutes, rotating after 5 minutes. When the crust is golden, the cheese is melted and the egg yolks are cooked, use the peel to transfer the pizza to a cutting board. Sprinkle half of the parsley, chives, scallions and shallot on top. Let cool for 2 minutes, slice and serve immediately. Prepare the second pizza in the same way.

* The original recipe suggests that you take the dough out one hour before baking but I took mine out two hours earlier, because I always find it takes a looong time to get dough back to proofing at room temperature. In this time, you can lazily prepare the toppings and get your oven nice and hot.

Breakfast Pizza Recipe 

Breakfast Pizza Recipe 

Breakfast Pizza Recipe 

Breakfast Pizza Recipe 

Breakfast Pizza Recipe 

Breakfast Pizza Recipe 

Breakfast Pizza Recipe 

Breakfast Pizza Recipe 

Breakfast Pizza Recipe 

Breakfast Pizza Recipe 

Breakfast Pizza Recipe